Set up Rig, from sign-up to your first answer
Rig Ingest pulls your business data into a warehouse and builds an AI-ready context layer on top. This is a guided tour of getting set up end to end, from sign-up to your first dashboard and skill, following a walkthrough by Rig's founder, Toby.
Watch the tour
Sign up and get verified
Rig is approved-access while we onboard our first customers. After you sign up, a member of the Rig team reviews and approves your workspace. Once you are approved, open Connections in the left sidebar and work through the steps below. Each one shows a tick when it is complete.
Provision a warehouse
Your data needs somewhere to land. Choose a Rig-hosted warehouse and we provision one for you in minutes, or bring your own BigQuery, Snowflake or Redshift and Rig writes into it. You can switch later by detaching and re-provisioning; data already in your warehouse is left untouched.
For technical audiences
Rig-hosted warehouses are completely tenant isolated. Every client gets a separate warehouse that we manage, so nothing is shared across customers. Prefer to bring your own? Rig writes into your BigQuery, Snowflake or Redshift instead, and the data already in your warehouse is left untouched.
Choose a language model
Rig uses a language model to read your warehouse, build context and answer questions. Use the Rig-hosted model or bring your own provider key. You can swap providers at any time without re-syncing your data.
Your data stays yours
The Rig-hosted model runs with do-not-train enforced and per-workspace trace isolation, so your data is never used to train anyone's model.
Connect your sources
This is where you connect the tools your data lives in: your CRM, support desk, billing, product analytics and more. Search for a source, enter its credentials, then run Test to pull a small sample and Sync to run the full pipeline. Each source lands in its own schema in your warehouse, so nothing is mixed together.
Sources
Each connector lands in its own per-source schema. Test pulls a small probe; Sync runs the full pipeline.


Per-source setup guides
Every source connects a little differently. Some use an API key, some a token, and some a one-click sign-in. Browse the full catalog of sources Rig connects on the integrations page, or jump straight to a step-by-step setup guide:Connect SalesforceSalesforce access for migration & auditConnect ZendeskConnect JiminnyConnect Beam (Lightmeter)Connect StrapiConnect Xero
Build your context layer
Once your sources are in, Rig builds the context layer automatically: table and column descriptions grounded in real sample rows, detected relationships between tables, a business glossary, grain hints and certified metrics. This is what lets your AI tools answer accurately instead of guessing. Watch progress on the Build context step, and rebuild any time you add a new source.
Go deeper on rules and metrics
Learn how usage rules and governed metrics work in Teach Rig your tribal knowledge.
Build a dashboard in Claude
In Claude, with the Rig MCP connector turned on, you can ask for an interactive dashboard. Claude pulls the data from Rig and builds it, and you can ask Claude to save it back as an automation on Rig.
Back in Rig, that dashboard now lives in Data Apps. You can see the underlying data behind it, and you can share or embed it so colleagues with the right permissions can access it too.
The full dashboard playbook
Walk through building governed dashboards step by step in Vibe code dashboards on internal data with Claude Cowork.
Create a skill
As you work with Rig you can also create skills. For example, you can build a skill that takes your sales calls and applies Rob Snyder's pull framework to categorize each call by how strongly the customer expressed pull for what you are building. It uses a Rig workflow to build a data model from that, which you can then use in your analytics. Ask Rig to review yesterday's sales calls, categorize them by how strong the pull is, and update the CRM with that information.
Turn a question into an automation
See how to schedule recurring work in Automate your first workflow.
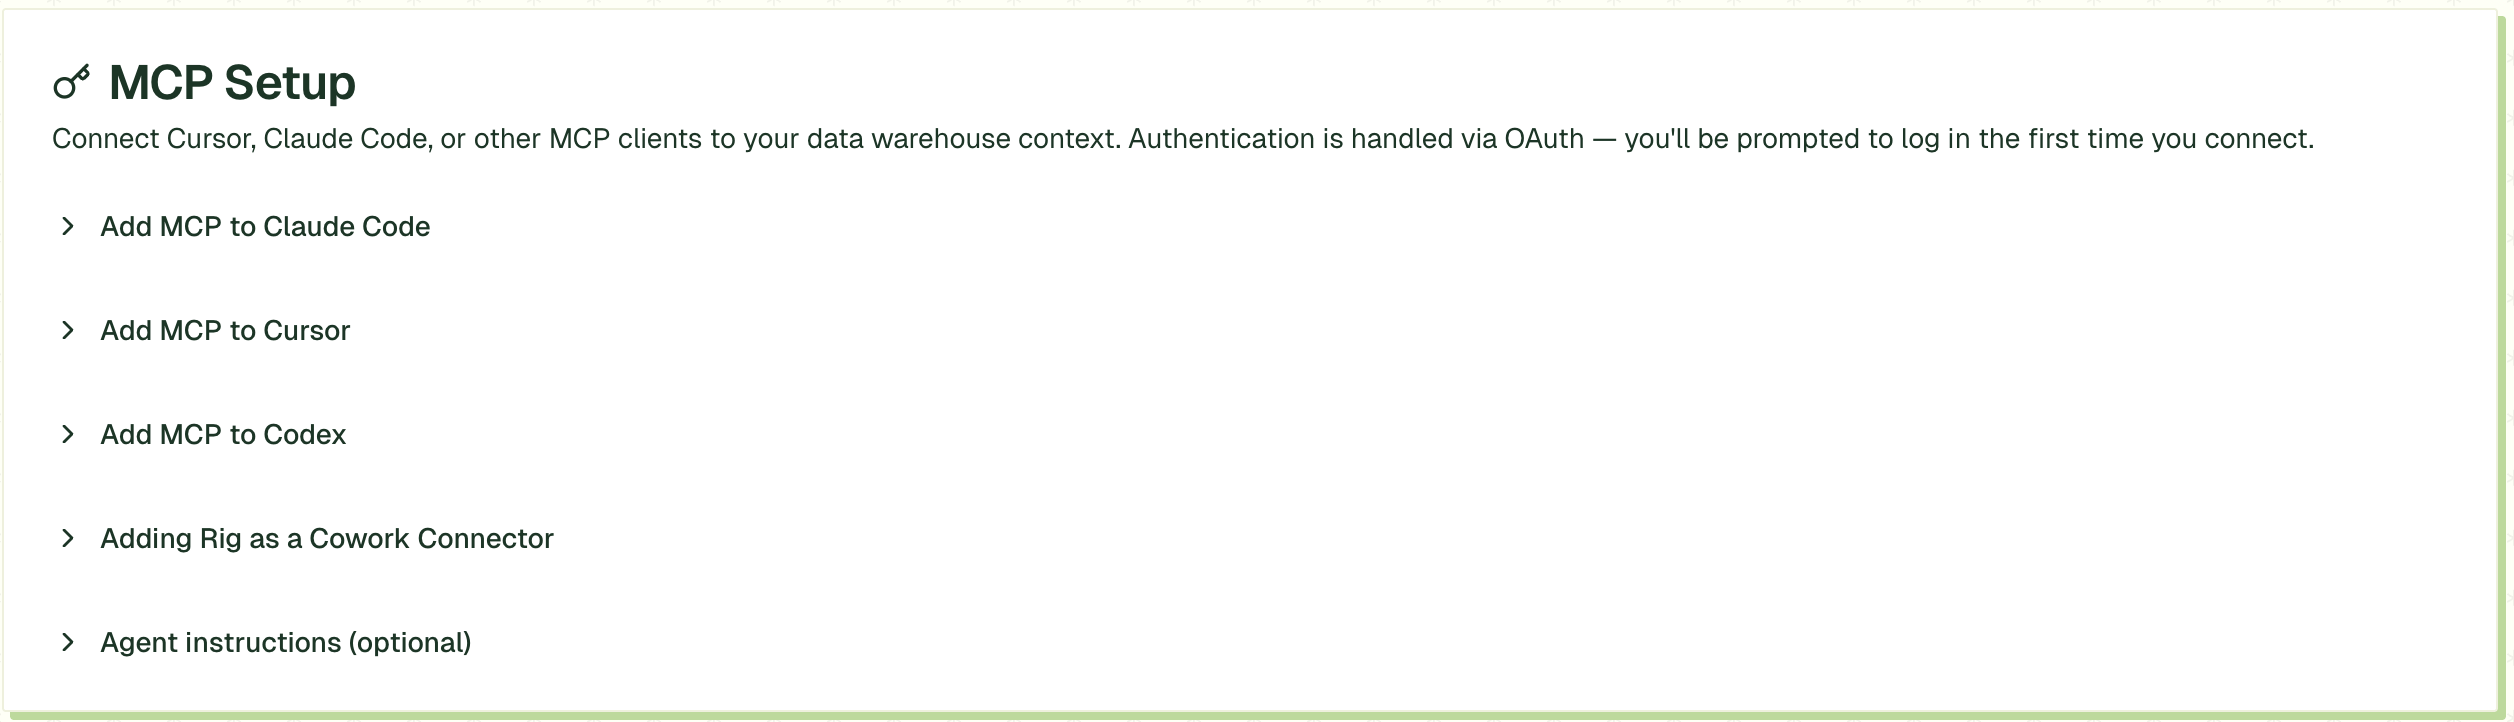
Add the MCP to your tool
Once you are set up and your data is ingested, open Settings and go to MCP Set-Up. There you will find the instructions for adding the Rig MCP to your tool of choice, so you can start querying your data from your own tools.
Connect your AI tools
For per-tool setup, see Connect Rig to your AI tools. Questions? Reach us at info@rig.so.